Southern California anticipated a wet winter. For our 4th grade art class, that was an invitation to prepare, and to celebrate, with a little art. So that’s what we did from September to early November with the creation of ceramic rain catchers. It became a bridge between education, ecology, and creativity.
Shapes
The first step was for the students to decide what types of rain catchers they wanted to make; the possibilities were numerous. Looking at natural rain catchers—for example, cup-shaped leaves and flowers—as well as brainstorming about them provided inspiration. From there, students transferred their ideas to paper. And after that, to clay.
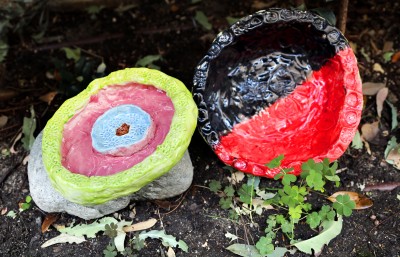
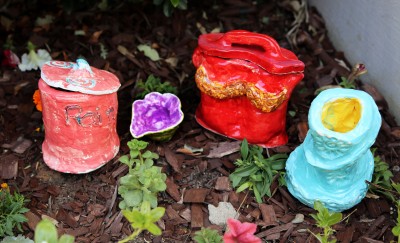
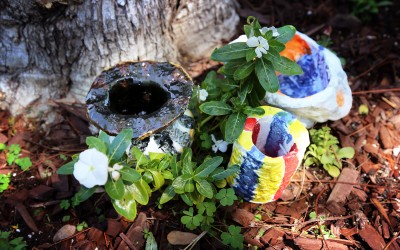
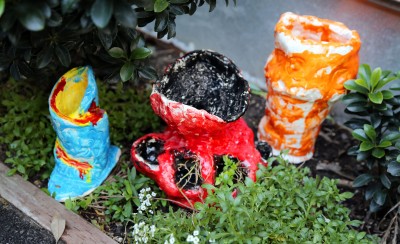
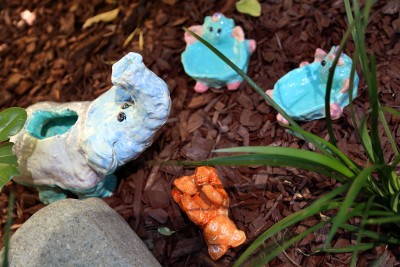
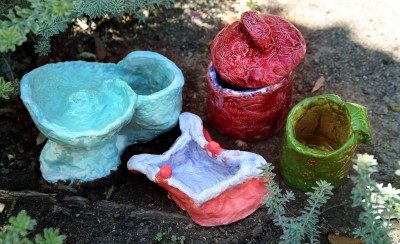
Another thing that helped in their designs were small scale models, which allowed them to practice and explore further with styles. In the end, many natural forms emerged: double pools, spiral fountains, floral forms with inverted and extended petals, frogs with wide-open mouths, reclining animals whose soap dish tummies would catch water, and tower-like structures with hollow cylindrical centers.
Methods & Materials
As part of their 3rd grade Native American study, students are introduced to gray clay by sculpting Totem animals—such as a raven, spider, dolphin, horse, hawk, raccoon, and badger—randomly selected from a group of cards laid face down by their classroom teachers, and red clay Hopi coil pots after the master potter, Maria Martinez.
This particular year, 4th graders got an in-depth study into ceramics, defined as “hand made pottery or ceramics for the table,” through the rain catcher project. (I used the word “ceramics” loosely to distinguish it from head sculptures, such as clay busts or abstract works.) The chance to experiment with shaping various clay forms, glazing colors, and techniques gave them more hands-on time to learn the material and work three dimensionally.
In terms of construction, a variety of methods were introduced. These included rope coil, four-sided slab, seamless round slab, and wrapped. The rope coil method involves rolling out long coils of clay and building upward with it, joining them together one row at a time inside and out. For the seamless round slab technique, a wooden roller and flat wood sticks are used to roll out slabs of clay, at which time a pattern may be added using a texture plate; afterward, they’re trimmed to create clean edges and gently placed around a cylinder (such as a coffee can). Then, the edges are blended to hold the shape and the cylinder is removed. For four-sided slab designs, slabs are rolled out, texture is added (if desired), and the sides are attached to a square or rectangular clay base. And wrapped forms consist of rolling out a slab, adding texture (if desired), then rolling it up as one would a croissant, only standing it on end, creating a Calla Lily-type shape.
Once the students chose an approach for sculpting their rain catchers, they went through options for glazes. On smaller clay pieces, they experimented with matte underglazes, glossy semi-transparent, opaque, and speckled glazes all in different colors. Finally set with their selections, the enlarged vessels were created. Each of them gleamed—inventive, sturdy, useful, and beautiful.
Learning
Generally, art classes in grades 3-6 dovetail with social studies courses: Native American Studies in 3rd grade, Ecology in 4th, Medieval Times in 5th, and Greek Democracy and Human Rights in 6th. Because of that, it’s important to connect what students are creating to what they’re learning. As a tie into Ecology, 4th grade students make landscape paintings on canvas after drawing drafts of their favorite campus trees. It allows them to sketch outdoors, which they enjoy, and to add other elements of nature ranging from realistic to imagined.
The rain catchers were also a perfect fit to their study of the eco-system as well as the connection between function and aesthetics, art and our environment. The project raised awareness of both the need for water conservation and the sheer preciousness of water, underscored by its scarcity against the backdrop of the prediction for an El Niño winter.